Getting Started
Onboarding into Opal
Opal Training
Opal Overview
StoryFirst Framework
Opal Calendar
Download Opal on Mobile
Navigation
Personal Panel
Notification Settings
Notifications and Subscriptions
Workspaces
Status Icons
Opal Glossary
Web Browsers and Security
Edit Your Profile
Edit Your Settings
Help & Support
Opal Features & Functionality
Opal API
Campaign Planner 101
Best Practices
Save time with Opal AI
Inside Look: How Opal Marketing uses Boards
Content Planning
Campaign Planning
Organize Briefs
Project Management
Executive Communications
Communications
Internal Communications
Paid Media
Social Media
Managing your Email content
Parking Lot for Content
Desktop App
Universal Features
Keyboard Shortcuts
Labels Sets and Labels
Filter, Search, and Sort
Collaboration
Notes
Manage Privacy & Permissions
Track Campaign Budgets
Flighting
Invite Users
Stamp Templates
PowerPoint Export
User Groups
Instant Log-In
Opal Insights
Work with Campaigns
Define Campaign Details
Moment Overview
Create & Manage a Moment
Customize Moments in Week View
Moment View Layouts
Moment Options
Move a Moment
Workflow on Moments
Manage Campaign Content
Content Overview
Channels & Content Types
Create & Manage Content
Content Composer Tabs
Content Options
Content Placements
Content Localizations
Previewing Content
Share Content
Publish Content
Export Content Metadata to CSV
Email Modules
Text Editor
Longform Content
URL Preview
Website Content
Channels & Content Types
Custom Content Channel
Digital Ad
Email Preview
Flickr
Radio
Snapchat
TikTok
Television
VK
YouTube
Embed Content
Opal Docs
Manage Assets
Assets Overview
View the Asset Library & Assets
Upload Assets
Edit Asset Settings
Export Asset Metadata to CSV
Use Tasks & Approvals
Workflow Overview
Use Workflows
Configure Tasks and Approvals
Manage Assignments
Approve and Decline Content
Share the Work
Presentations Overview
Create a Presentation
View a Presentation
Edit a Presentation and Slides
Share a Presentation
Canvas & Title Slides
Integrations
Chrome Browser Extension
Dash Social
Facebook Ads Manager
Firstup
Jira
Khoros
Khoros Admin Guide
Slack
Sprinklr
Sprinklr Admin Guide
Workfront
Wrike
Frame.io
Content Delivery Integrations
Asana
Sprout Social
Formstack
On-Demand Webinars
Opal Essentials
Opal Admin Training
Quarterly Product Showcase: Project Management
Quarterly Product Showcase: Boards & Browser Extension
Opal Essentials - Limited User
Opal Quarterly Showcase w/Lauren Scott of Zillow
Opal Quarterly Showcase w/Angelic Crippen of Intermix
Opal Quarterly Showcase w/Kelsey Dahlager of Target
Opal Quarterly Showcase w/Leah Randall of Minted
Admin
Naming Conventions
Set Up Your Opal for Success
Manage General Options
Manage Label Sets & Labels
Manage Channels & Accounts
Manage Workspace Workflow
User Directory
Manage Users
Role Capabilities
Viewer User
Limited User
Single Sign-On (SSO)
Customer Success
Types
Custom Fields in Plans
See What's New!
Changelog
Discover Boards, Your New Home in Opal
Browser Extension
Simplified & Streamlined Navigation
Nested Label Sets
Stamps
Opal Text Editor
Moment Flighting
Annotations
Your Marketing Calendar, Now on Mobile
Orchestrate & Visualize Your Website in Opal
Email Collaboration Made Easy
Do More In Your Favorite Views
Polished for a Purpose
Workflow In Opal
Workflow Improvements
Content Start and End Dates
Export to PDF
Content Change Tracking
Export Your Opal Data to CSV
Do More with Assets
Enhancing Collaboration with Access
Content Data Export
Added Accountability for Approvers
Facebook Canvas Ads
Plan & Manage Budgets
View & Schedule Timing of Content
New Moment Actions
September Campaign Planner Beta Update
Flexible Content Start Dates
Policies & Guidelines
Plans
Boards
- All Categories
-
- How to Integrate Real-Time Data into Your Plans with Zapier
How to Integrate Real-Time Data into Your Plans with Zapier

Integrate Real-Time Data into Your Plans with Zapier
Overview
Bring your team's most important metrics directly into your Opal plans. By connecting data sources like analytics tools, ad platforms, or spreadsheets to Opal via Zapier, you can automatically create and update graphs that visualize your key performance indicators (KPIs). This gives you the power to see the real-time impact of your marketing efforts right alongside the plans that drive them, enabling you to make smarter, data-informed decisions.
In this tutorial, we'll walk through connecting a Google Sheet to an Opal plan, but you can use any of the thousands of apps available on Zapier.
Step-by-Step Instructions
First, you'll set up a trigger in Zapier that watches for new data. Then, you'll configure an action to send that data to a graph in Opal.
1. Set Up Your Zapier Trigger
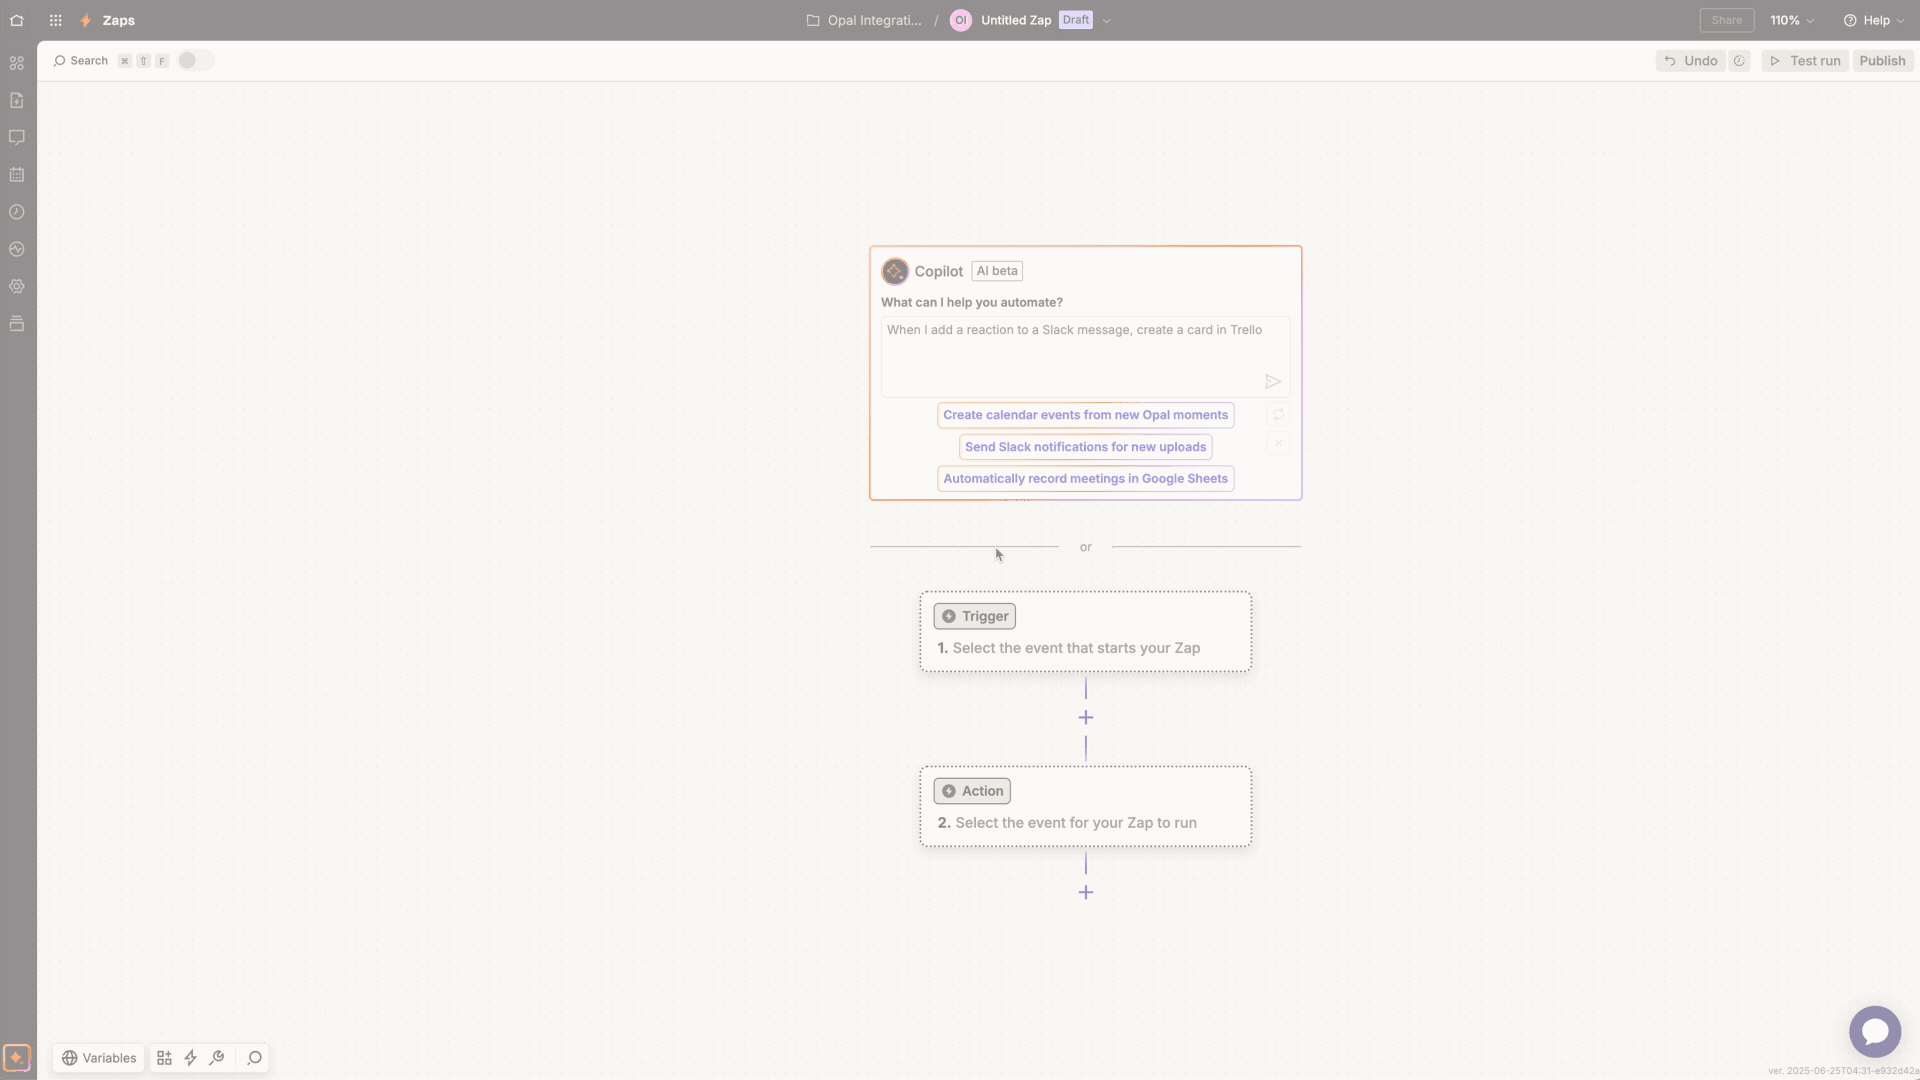
- In Zapier, click Create Zap to start a new workflow.
- For the Trigger, search for and select your data source app (e.g., Google Sheets).
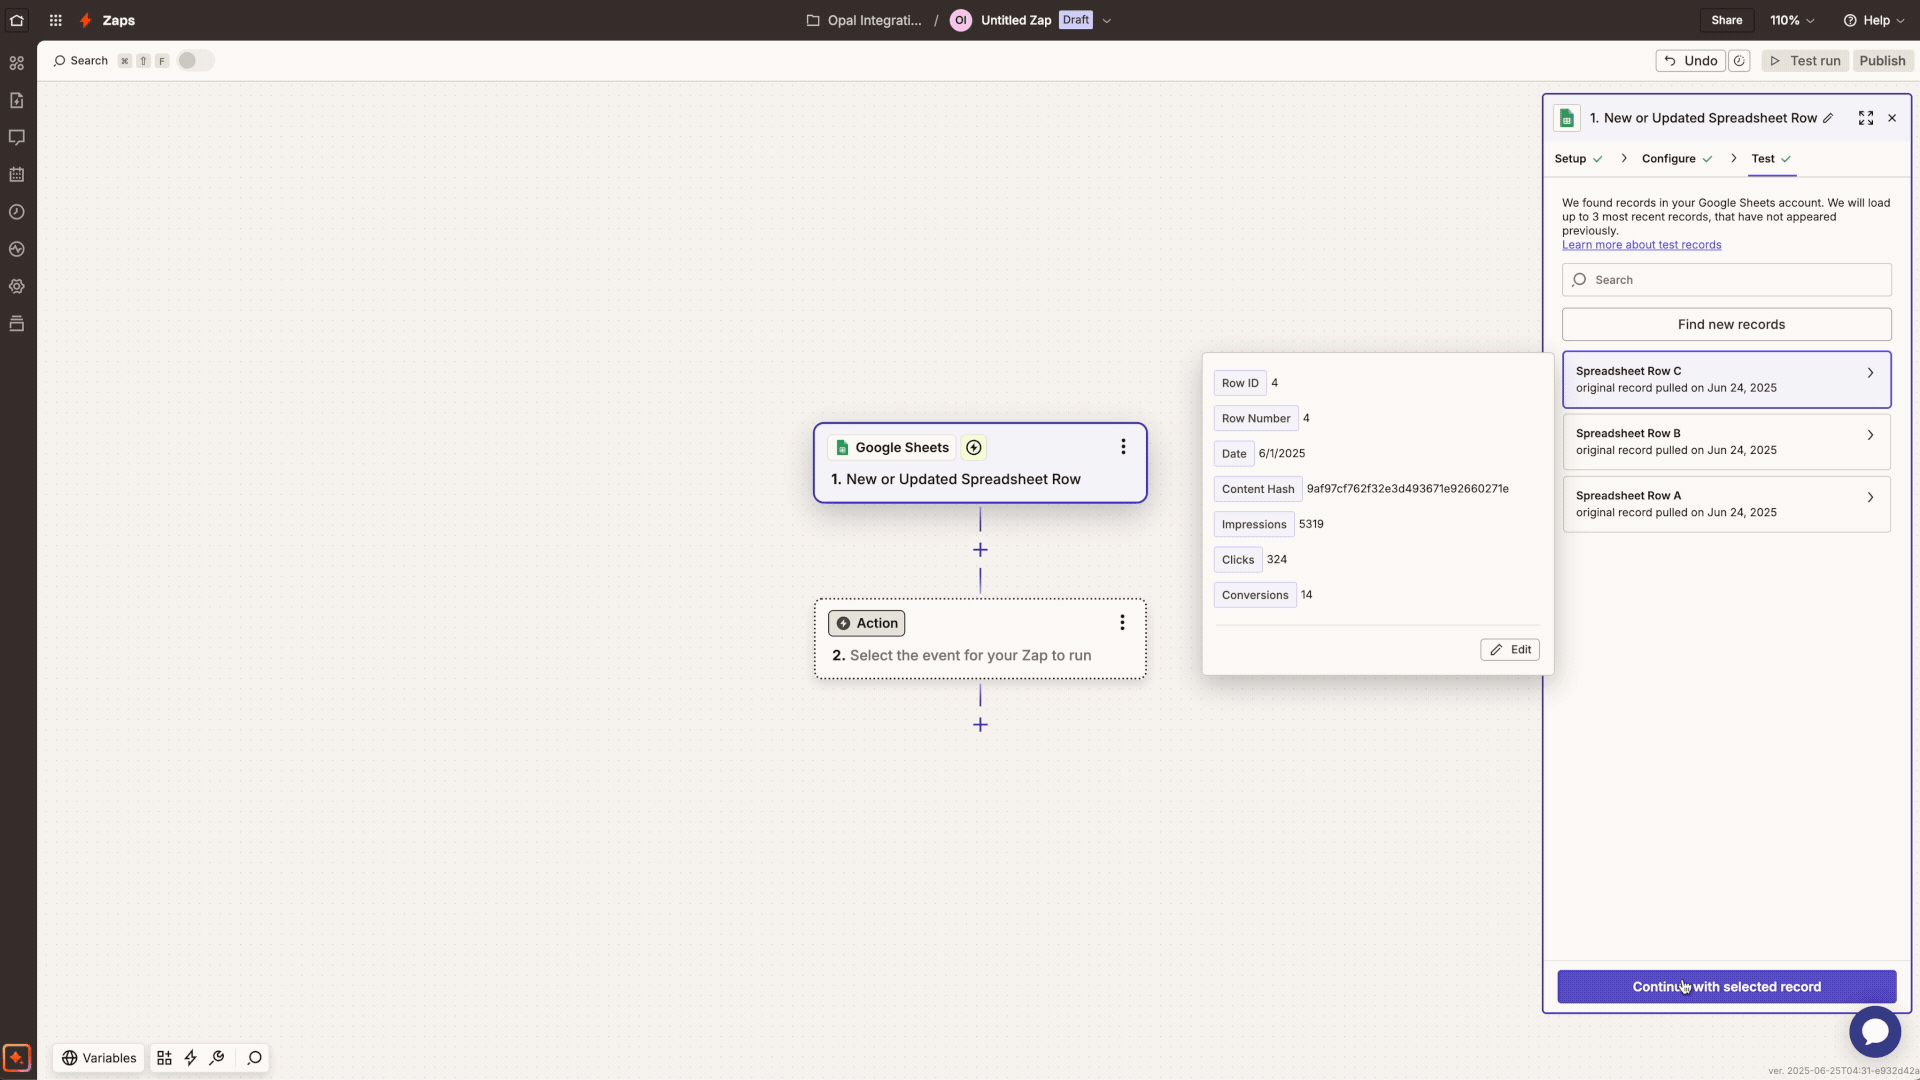
- Choose the event that will start your Zap. For this example, we'll use New or Updated Spreadsheet Row.
- Connect your account and select the specific spreadsheet and worksheet containing your data.
- Test your trigger to ensure Zapier can pull a sample record correctly.
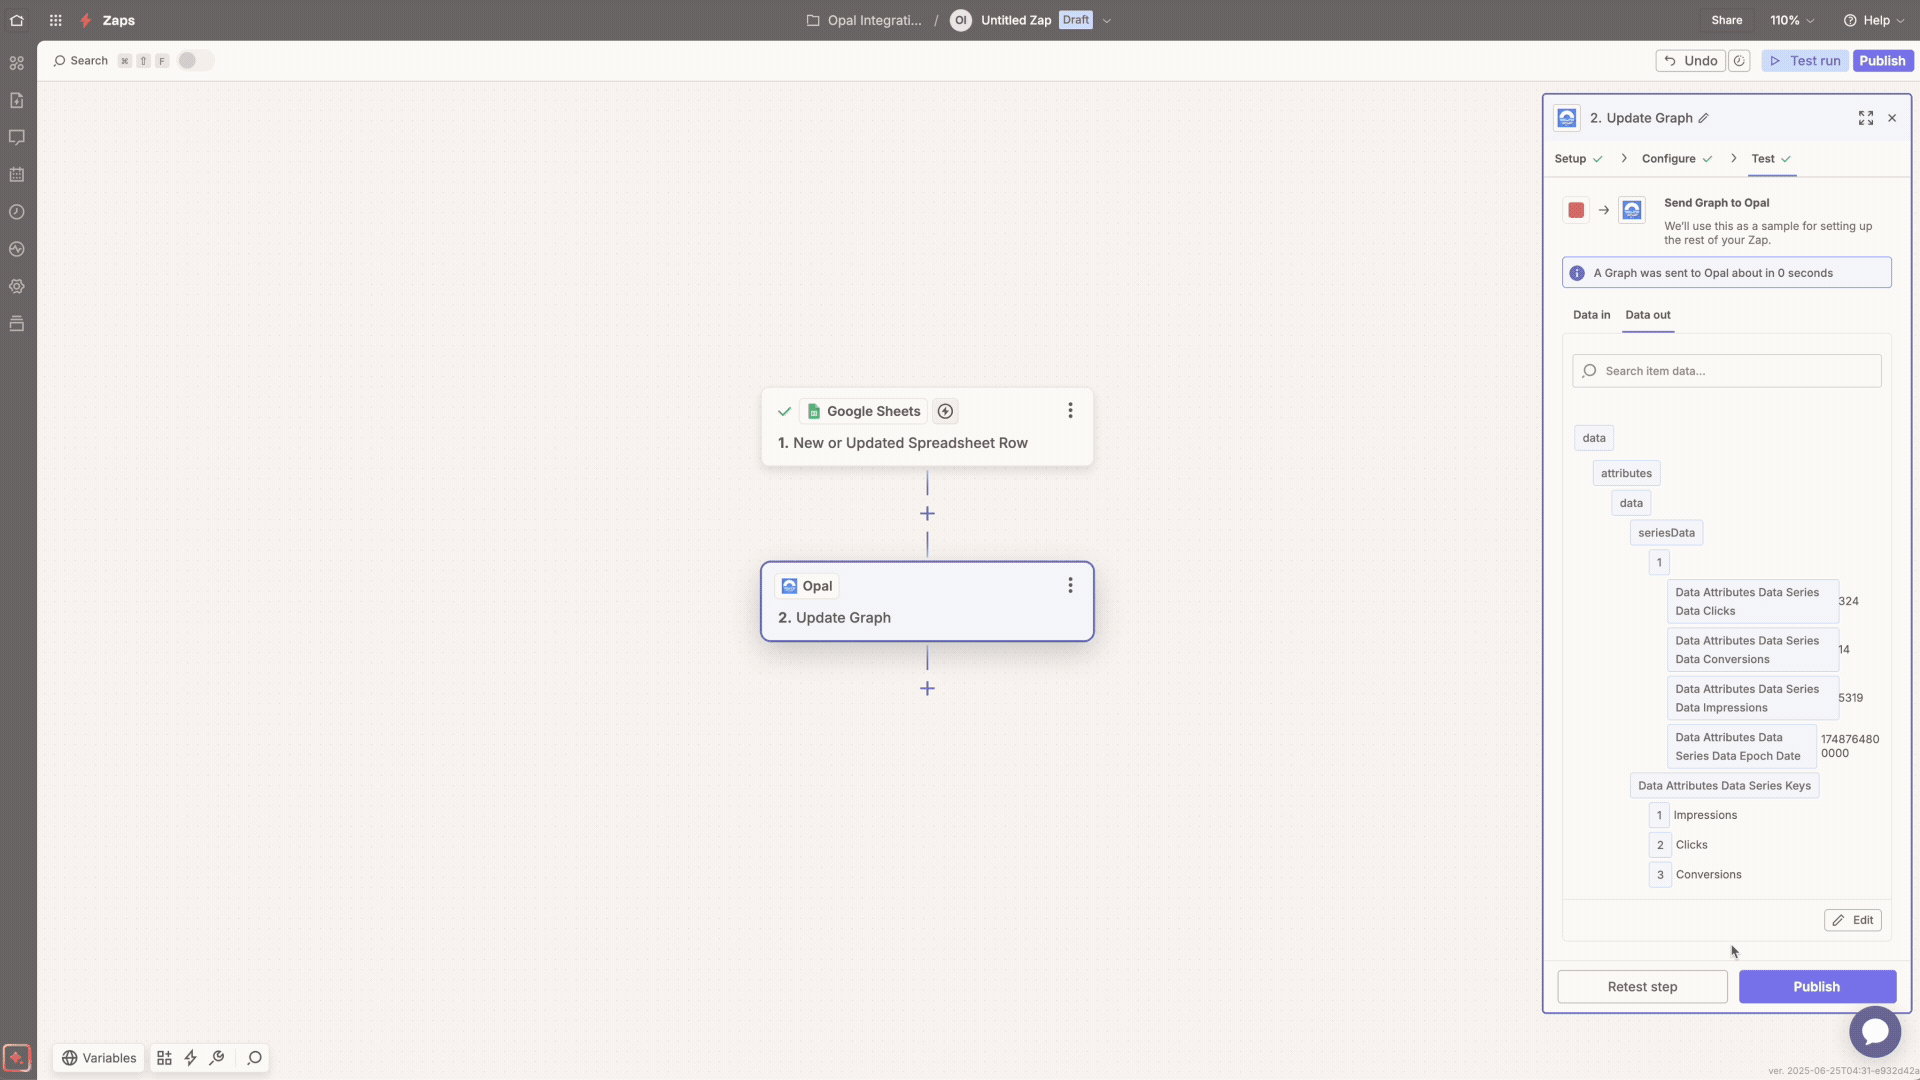
2. Configure the Opal Action
- For the Action step, search for and select the Opal app.
- Choose the Update Graph action event and connect your Opal account. You may be prompted to log in to authorize Zapier.
- Select the Workspace and Plan where you want the graph to appear.
- In the Graph field, either select an existing graph to update or type a new name to create one automatically.
- Map the Date/Time field by selecting the date column from your trigger data.
- Under Series Data, map your metrics. For each data point you want to track (e.g., Impressions, Clicks), enter a name for the series and select the corresponding data field from your trigger step. Click Add value set to add more series.
- Test the action step. Zapier will send the sample data to Opal, creating or updating your graph.
Note: If multiple records come in for the same date, the latest value will be set for the data point for that day.
Pro Tip 1: When mapping the Graph, you don’t need to create it in Opal first. Simply type a new name in the Graph field in Zapier, and the integration will create it for you on the fly.
Pro Tip 2: If you simply want to increment a value when a new record comes in, enter +1 as the value of the series instead of picking a data point.
3. Publish Your Zap
After a successful test, you’ll see the new graph with its first data point in your Opal plan. The final step is to click Publish in Zapier to turn your Zap on. Now, any new data that meets your trigger conditions will automatically update the graph in your plan.
Pro Tip 3: Once your Zap is published, you can click the "Transfer Existing Data" button to bring in any existing records. Otherwise, only records added after the Zap is published will be brought inData not updating in Opal? Make sure your Zap is published and turned on in Zapier. You can also re-test the trigger step to see if it's pulling the latest data from your source.
- Graph shows incorrect information? Edit the Update Graph action in Zapier. Carefully check that each field, especially the Date/Time and Series Data mappings, corresponds to the correct data from your trigger app.