Table of Contents
Create a Presentation

Opal Presentations makes it easy and safe to review, approve, and share your content in seconds.
Specify the content you want by using filter options, and then share it with anyone via a secure link and password or export it to PDF.
Create a New Presentation
Spin up a new presentation in seconds.
Via Calendar
- Navigate to Calendar.
- Select “Create Presentation.”
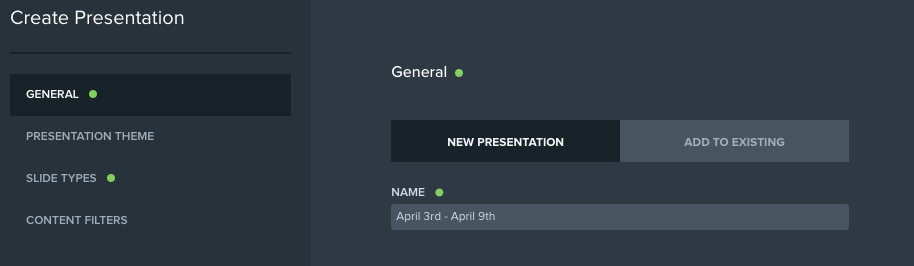
- Select the “New Presentation” button under General.
- Use the default name, or update it.
- Optionally, select a theme.
- Select slide types.
- Optionally, select filters to limit content to be added to the presentation.
- Click “Create.”
Via a Story Page or Moment
- Navigate to a story or moment.
- Click “…”
- Select “Create Presentation.”
- Select the “New Presentation” button under General.
- Use the default name, or update it.
- Optionally, select a theme.
- Select slide types.
- Optionally, select filters to limit content to be added to the presentation.
- Click “Create.”
Via Presentations
- Navigate to Presentations.
- Select “Create Presentation.”
- Select the “New Presentation” button under General.
- Use the default name, or update it.
- Optionally, select a theme.
- Select slide types.
- Optionally, select filters to limit content to be added to the presentation.
- Click “Create.”
Add to an Existing Presentation
Add content to a previously created presentation.
- Navigate to a story or moment.
- Click “Actions.”
- Select “Create Presentation.”
- Select the “Add to Existing” button under General.
- Use the dropdown to select a presentation.
- Select slide types.
- Optionally, select filters to limit content to be added to the presentation.
- Click “Create.”
Presentation Options
Use presentation options to personalize each presentation by adding a unique name, theme, slides, and more.
General
All new presentations are given a default name that included the default timeline of the presentation. Alternatively, give your presentation a unique name.
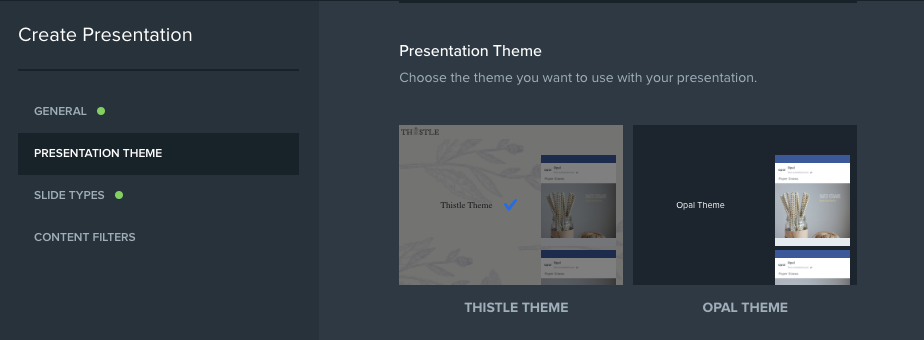
Presentation Theme
All new presentations will have the default theme selected.
However, for Opal's that are configured with a custom theme, you can use the custom theme or default theme.
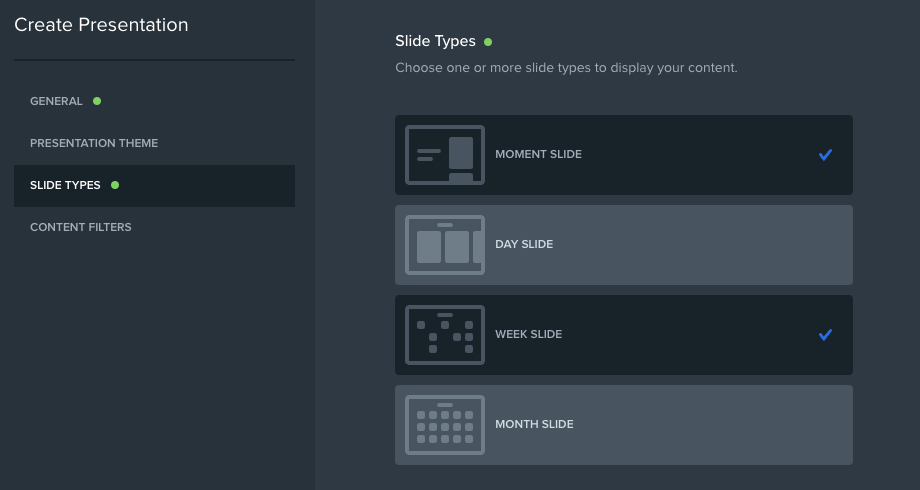
Slide Types
- Moment Slide - A single slide for every moment that contains content within your presentation date range. Each moment slide will contain all content within each moment.
- Day Slide - A single day-by-day slide that contains all content within the selected date range within one slide. This slide is the presentation version of the calendar's day view.
- Week Slide - An individual slide for every week within the presentations date range. This slide is the presentation version of the calendar's week view.
- Month Slide - An individual slide for each month represented within the presentation's date range. This slide is the presentation version of the calendar's month view
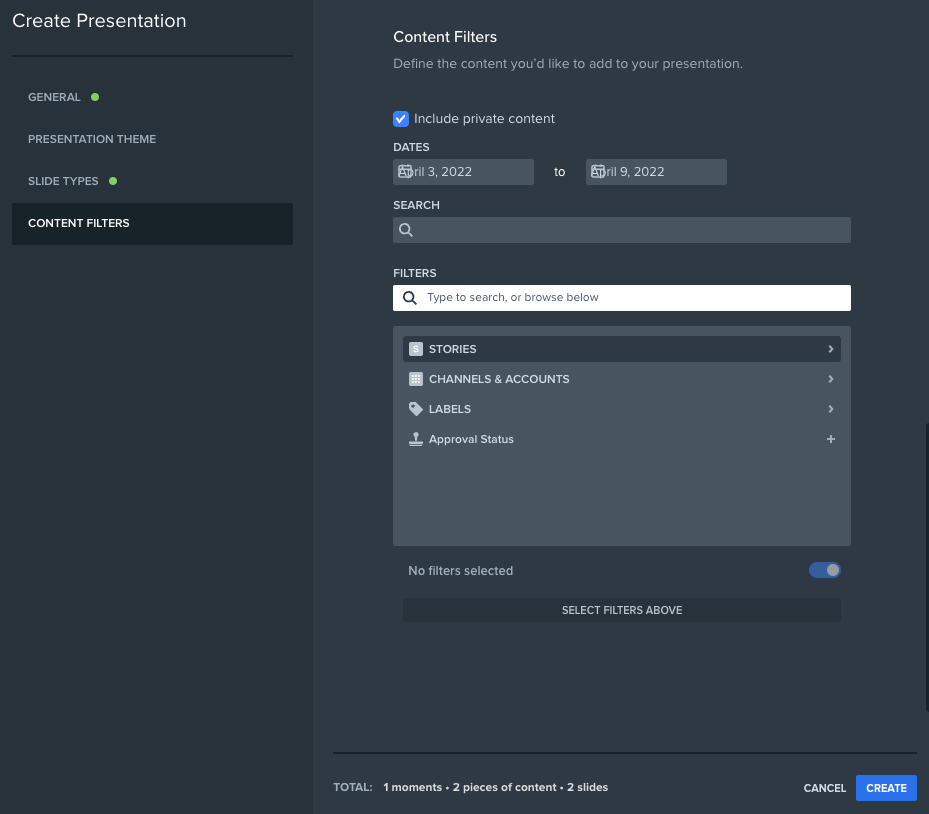
Content Filters
Use the dates, filters, and keyword search options to specify exactly which moments and content you'd like to include in your presentation.
Whatever content was visible on the page from which the editor was initiated will be shown in the settings by default.
For example: if you were viewing the calendar by week with the Winter label filter enabled, and clicked Create Presentation, the presentation creator will reflect the dates of the week you were viewing, and the Winter label will be automatically selected.
As the presentation is created, you can either wait until it’s finished or select “continue working” to navigate back to your previous view. You will receive a notification in the Personal Panel when the presentation is completed.
Additional Information
Slide Counter
The counter in the footer displays the number of moments, pieces of content, and slides that will be included in a presentation. These numbers are updated in real-time based on the selections made while creating a presentation.
Custom Theme Requirements
If you are an Opal admin, and are interested in adding a custom theme to your workspace, please include the following when reaching out to Support or your Customer Success Manager.
Opal admins, use this form when you're ready to submit the details below.
Slide Logo
- Logo - The logo that will appear on each slide
- Logo Location - Header or footer
- Background Color - The color for the slide header or footer background, e.g. #5DA3E6
- Alignment - Left, center, right
Slide Background
- Color - The color for the slide background, e.g. #5DA3E6
- Image - The image that will appear on all slides
- Opacity - The opacity of the image, e.g. 20%
Slide Header Typography
- Type - The font for all header text
- Color - The color for the slide text, e.g. #5DA3E6
- Size - 35px, 48px, 64px
- Weight - Normal or bold
Slide Body Typography
- Type - The font for body text
- Color - The color for the slide text, e.g. #5DA3E6
- Size - 20px, 24px, 36px
- Weight - Normal or bold
Content Card
- Footer Color - Light or dark