Table of Contents
Create & Manage a Story
Get your team started on a new campaign by creating a new story in your workspace.
Create a Story
- Click “Stories” view in the navigation sidebar.
- Click “Create a Story” located in the top right-hand corner.
- Complete the required fields in the following sections: Basics, Timeline, and Labels, and add supporting details where applicable.
- Basics - Give your story a name, and optionally, add a short description or goal, upload an image, include a brief, or provide additional context for collaborators.Note: Opal stories are public by default in order to increase visibility and collaboration. A private story will be visible to the story creator and users who are invited or added as approvers after the private setting is selected.
- Timeline - Specify the date range of your story.
- Workspaces - In workspaces, select the workspace(s) this story will be visible in. Workspaces will only appear in Opals that have multiple workspaces configured.Note: An Opal with multiple workspaces will display the workspaces section in the story creator. Here you can select which workspaces you would like the story to appear in.
• Select “Just (current workspace)” to make the story visible to only the workspace in which it was created.
• Select “(current workspace) and other workspaces” to allow this story to be visible in other workspaces. This is known as a shared story. All current and new content in the story will be visible in the other workspace. - Labels - Select labels that all moments and content will inherit automatically.Note: Required labels must be added to a story before it can be created. Optional labels can be added if desired.
- Workflow - Add approval or task phases for content in the story.Note: New content within this story will automatically inherit any added workflow phases, and can be changed or deleted on individual pieces of content.Important: Story level workflow phases will be applied to content before any phases inherited from either the account or workspace.
- Basics - Give your story a name, and optionally, add a short description or goal, upload an image, include a brief, or provide additional context for collaborators.
- Click “Create.”

Edit a Story
- Click “Stories” view in the navigation sidebar.
- Click on the relevant story.
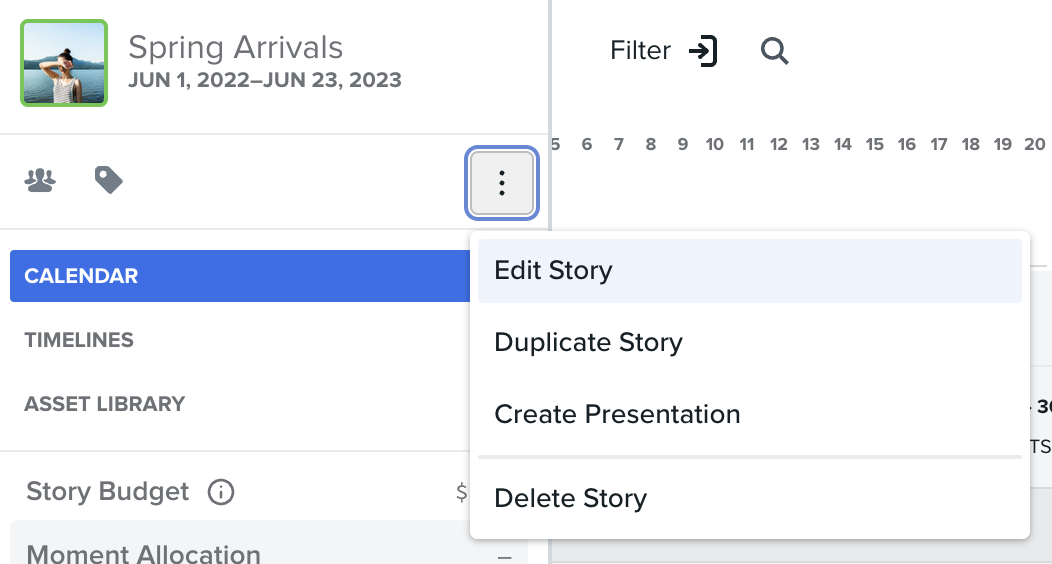
- Click the ⋮ icon , then click “Edit Story.”
- Edit the settings.
- Click “Save.”

Reschedule Moments and Content
Move all moments and content forward or backward within a story.
- Click “Stories” view in the navigation sidebar.
- Click on the relevant story.
- Click the ⋮ icon , then click “Edit Story.”
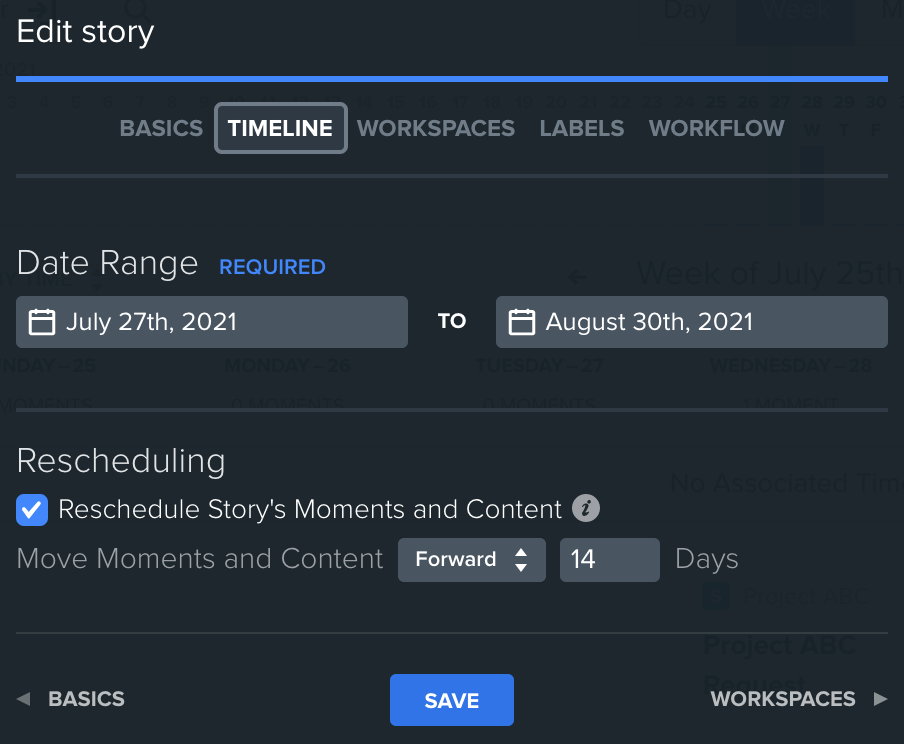
- Click “Timeline.”
- Click the checkbox to 'Reschedule Story's Moments and Content'.
- Select Forward or Backward via the dropdown.
- Enter the number of days all moments and content should be moved.
- Click “Save.”

Duplicate a Story
- Click “Stories” view in the navigation sidebar.
- Click on the relevant story.
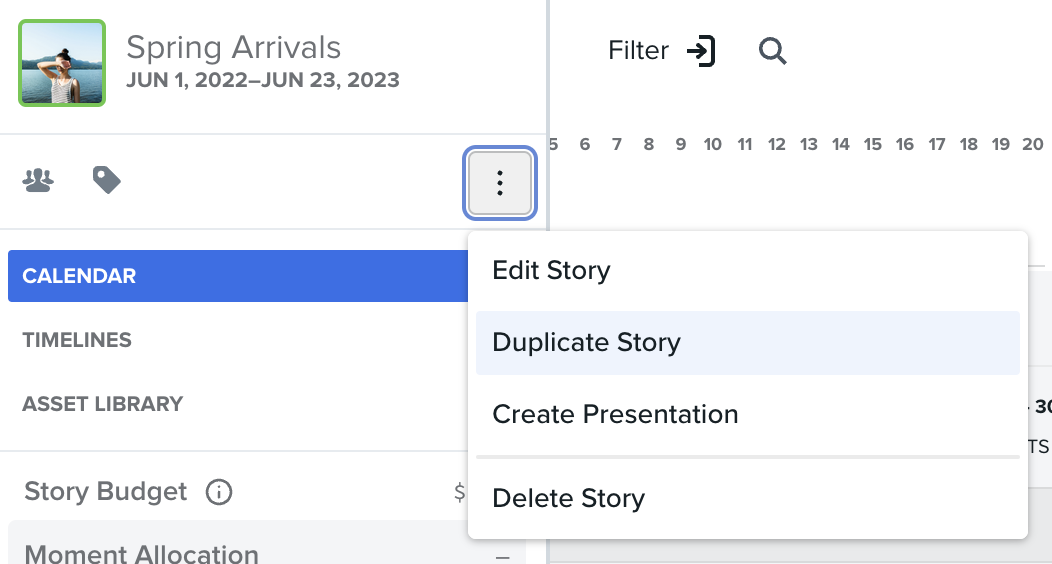
- Click “Duplicate Story” in the story sidebar.
- Update the “Story Name.”
- Choose the preferred duplication option:
- Include moments and full content. Everything in the current story will be duplicated, i.e. moments, content copy and assets.
- Include moments and content placeholders. All moment and content placeholders will be duplicated. Assets and copy text will not be duplicated.
- Include only moments. All moments will be duplicated. Content copy and assets, will not be duplicated.
- Only duplicate Story. The story details will be duplicated. Moments, content copy and assets will not be duplicated.
- If available, select the relevant workspace.
- Update the Story Name and Story Description.
- Update the “Story Date Range.”
- Click “Duplicate.”
Note: When a story is scheduled in the future, moments will be rescheduled the same time frame as the story.
Important: The cadence of moments will remain the same as the original story in the duplicated story. If the length of the duplicated story is shortened too much, some moments may not appear.
Important: Workspaces may not have the same labels sets, labels, or accounts. When a story is duplicated, additional actions may be needed to fully realize a duplicated story.

Delete a Story
- Click “Stories” view in the navigation sidebar.
- Click on the relevant story.
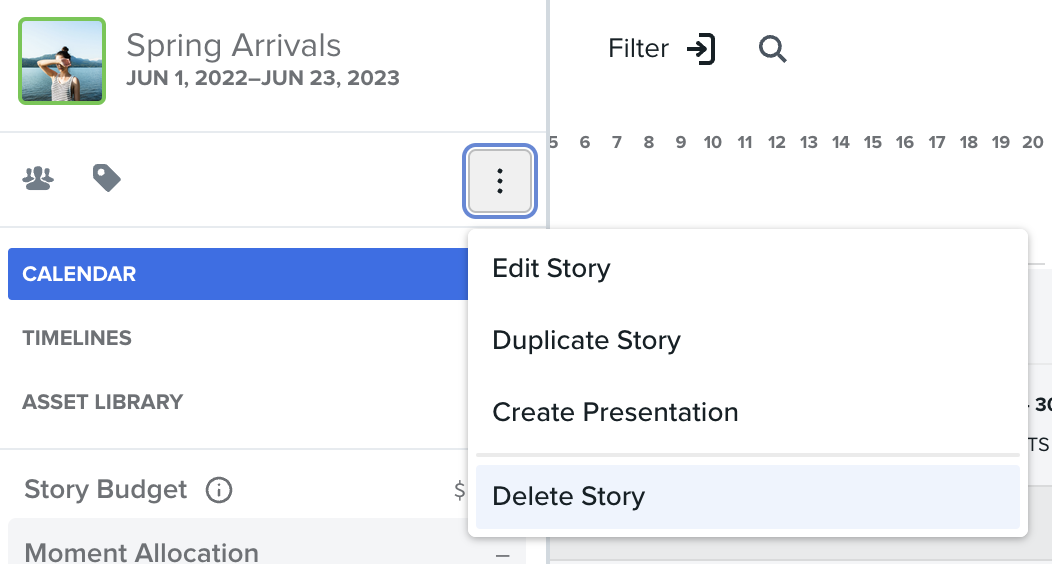
- Click the ⋮ icon, and select “Delete Story.”
- A pop-up window will appear asking for you to confirm that you wish to delete the story. Click “Confirm” if you would like to delete the story. Click “Cancel” to return to the story.
Important: When a story is deleted, all its moments and content — including assets used within content — will also be deleted.

Additional Information
What metadata is included when a story is duplicated?
- Story description
- Privacy settings
- Budgets
- Assets
- Labels
- Workflows
- Content delivery settings
- Notes
When duplicating a story, will Chat & Activity from the original story be included?
No. Chat & Activity is specific to the story it takes place in.
