Table of Contents
Manage Label Sets & Labels

Organization is a key component to efficient and collaborative workflows.
Keep your workspace organized by setting up and managing label sets and labels. Applying labels throughout the StoryFirst framework will make it easy for everyone on the team to easily filter and sort content.
Use the following steps to configure label sets and labels for your workspace.
Add Label Sets & Labels
Use label sets and labels to personalize your workspace metadata.
- Hover over the sidebar, then click ⋮, located next to the Opal logo.
- Hover over Configure Workspace, then click “Labels & Label Sets”.
- Click “Add Label Set” then enter the label set name.
- Click “Create” to save the label set.
- Optional: Select label set options...
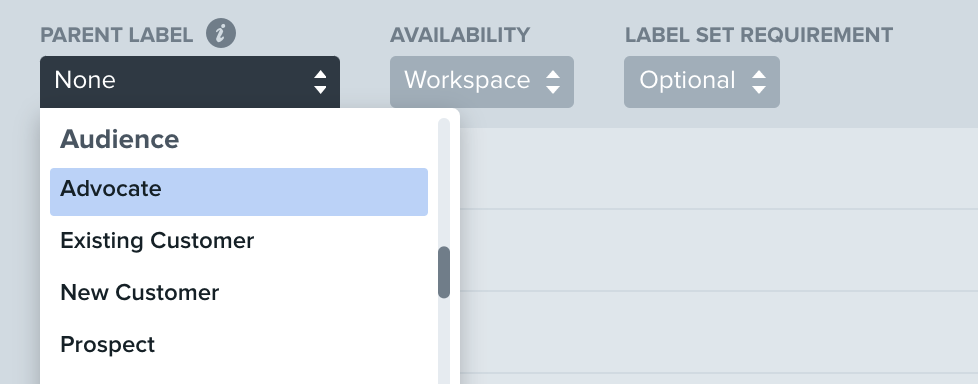
- Parent Label
- Availability
- Label Set Requirement
- Click the "Add label" text, then enter the label name.
- Click “Add” to save the label. There is a 50 character maximum for each label.
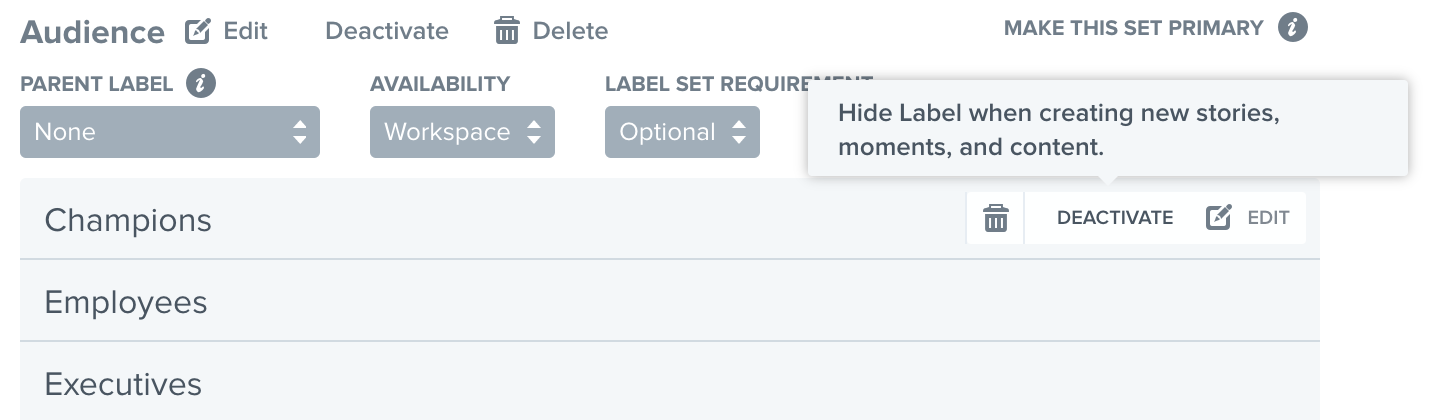
Configure Label Set Options
Set Label Set Color
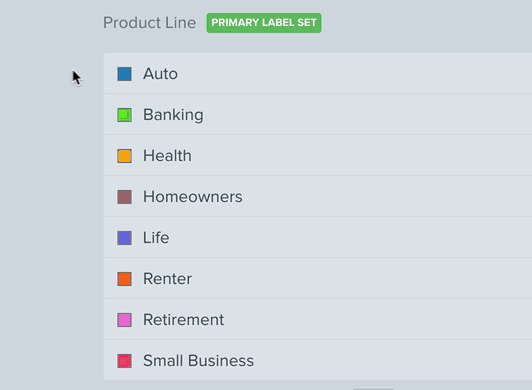
Admins can set the color for labels within the primary label set. These changes will affect story colors in Stories view.
- Hover over the sidebar, then click ⋮, located next to the Opal logo.
- Hover over Configure Workspace, then click “Labels & Label Sets”.
- Within the primary label set, click the color square next to label.
- Select a new color or enter the color code.
- Click outside the color selector box to save.
Parent Label
Nest a label set with another label set to act as a trigger for the nested label set to appear when creating a story, moment, or piece of content.
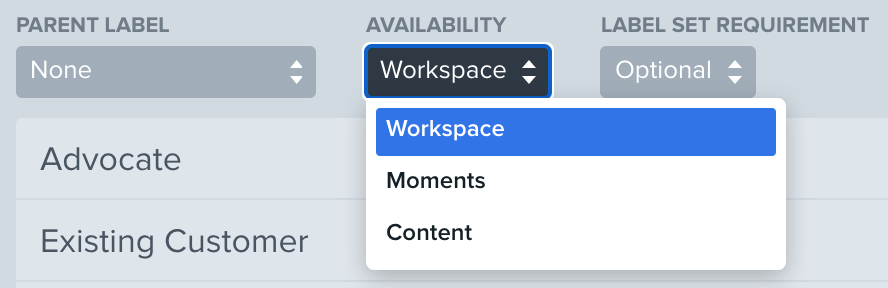
Availability
By default, users will be able to select labels within a label set when creating or editing a story, moment, or piece of content.
However, Opal admins can optionally choose to hide a label set at the story and moment level, only surfacing the label set as an option on content.
Availability
Choose where a label set should appear.
- Click the Availability dropdown.
- Select “Workspace,” “Moments” or “Content.”
Availability options will display label sets to users in the following way:
- Workspace - stories, moment, and content
- Moments - moments only
- Content - content only
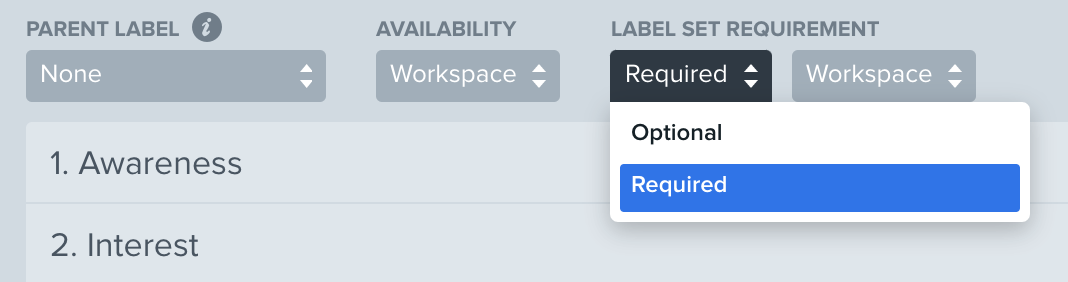
Label Set Requirement
Additionally, admins can choose to require a label be applied to a story, moment, piece of content or account prior to creation.
Label Set
By default, Optional is selected and will not require users to select at least one label prior to saving the story, moment, or piece of content.
- Click the Label Set Requirement dropdown.
- Select “Required.”
Doing so will require users to select at least one label within the label set, prior to saving the story, moment, or piece of content.
A required label set has the following options: Workspace, Moment, and Content.
- Workspace - stories, moment, and content
- Moments - moments only
- Content - content only
Account
Lastly, labels can be marked as required for content planned for any one account via the admin Channels & Account tab.
- Hover over the sidebar, then click ⋮, located next to the Opal logo.
- Hover over Configure Workspace, then click “Channels & Accounts”.
- Locate the relevant account.
- Click the label icon.
- Click the Required checkbox.

Edit Label Sets & Labels
When a label set or label is edited, all previous references will update to the new name.
- Hover over a label set name or a label to edit or delete.
- Click on the corresponding icon to edit or delete the label set or label.
- Click “OK” to confirm.

Deactivate Label Sets & Labels
Admins can deactivate an entire label set or individual labels when it is not needed temporarily or permanently.
If plans change, activate a label set or individual labels at any time.
- Hover over a label set name or a label to deactivate it.
- Click on the corresponding icon to deactivate the label set or label.
- Click “OK” to confirm.
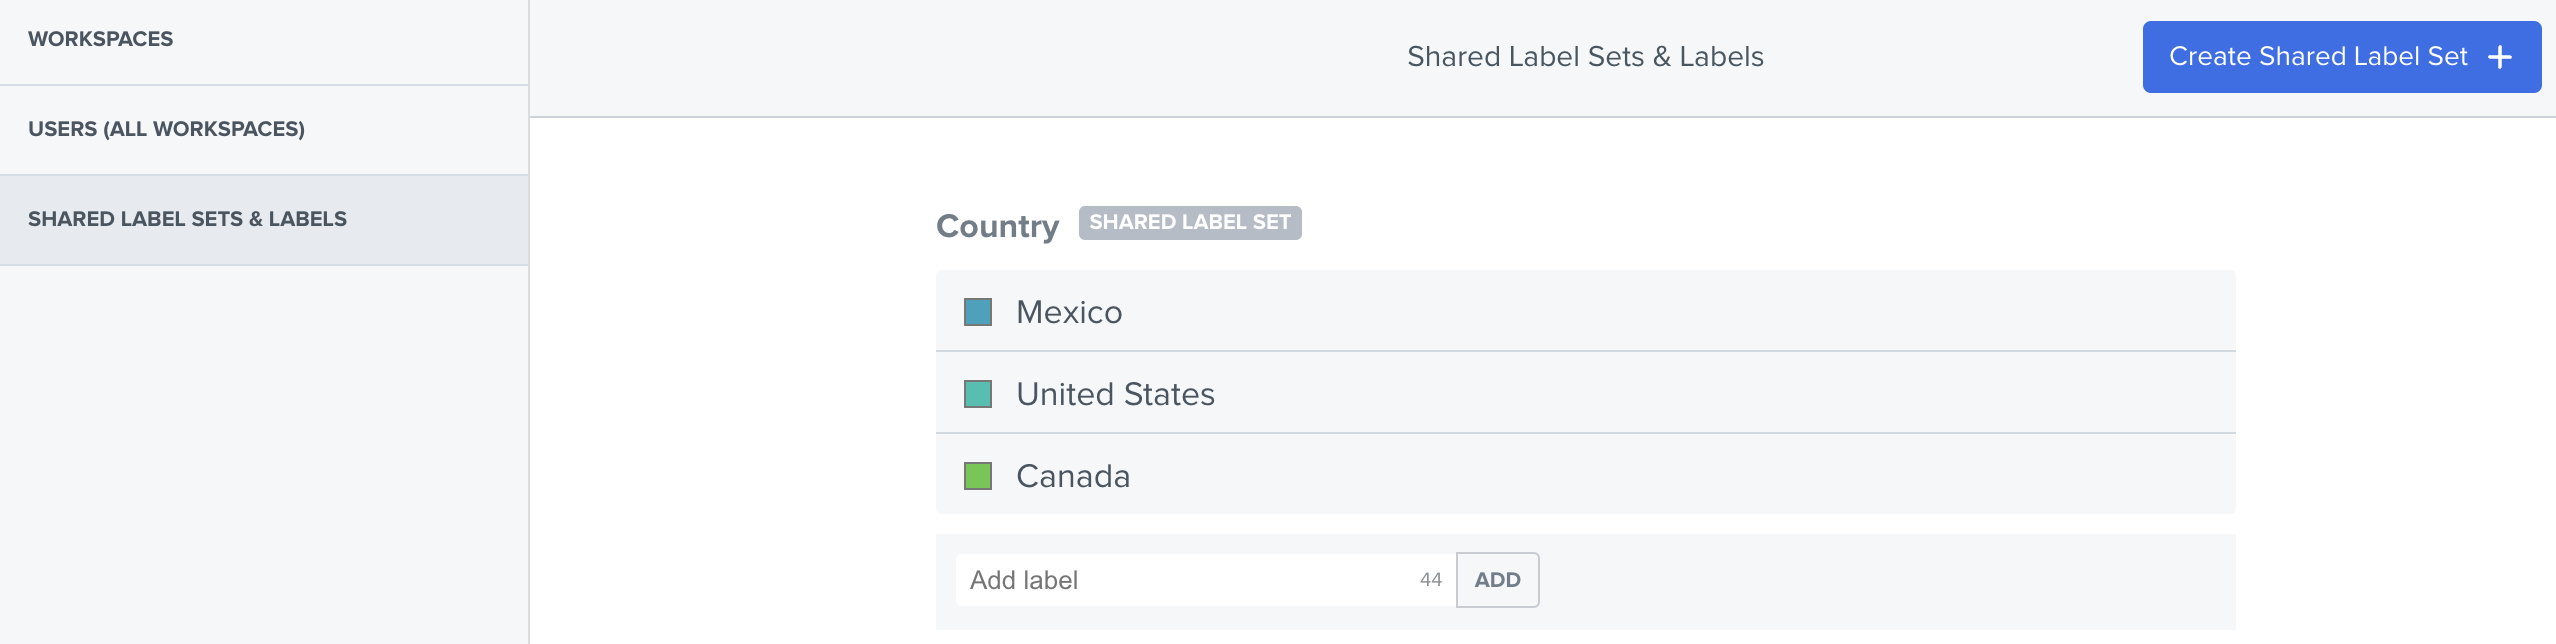
Add Shared Label Sets and Labels
If your Opal has multiple workspaces, it may be helpful to have a shared label available in each workspace to keep your plans in full alignment.
- Hover over the sidebar, then click ⋮, located next to the Opal logo.
- Hover over Configure Opal.
- Click Shared Label “Sets and Labels”.
- Click “Create Shared Label Set”.
- Add a label set name.
- Click “Create”.
- Click “Add Label”, then add a label name.
- Repeat as necessary.
Additional Information
If label set or label name is updated, will all previously tagged items reflect the new name, or retain the original name?
When an existing label is updated, all objects that label was applied to will update to the new name.