Table of Contents
Content Localizations

For global or regional marketing teams, the most effective content is often tailored for a specific audience, region, or demographic. In many cases, multiple versions of a single piece of content must be created to accommodate specific regional needs.
Localization is the process of adapting a product or content to a specific locale or market. Translation is only one of many elements to consider when localizing content. The localization process may also include:
- Adapting graphics to target markets.
- Adapting design and layout to properly display translated text.
- Converting to local requirements, such as currencies and units of measure.
- Using proper local formats for dates, addresses, and phone numbers.
Localize Content
The process of localizing content in Opal is done by creating custom, localized copies with Opal’s content localizer.
To start localizing content, an original piece of content must be created for a general audience, region or demographic. Once the original content is finalized, teams can choose to create localized copies of content and assign them to users responsible for creating content in their region. Each piece of localized content can then be modified by the assigned users to include adaptations for their local.
When the localization process is completed, a single post will have multiple versions, each specific for its intended market. In Opal, these localized versions of content “localizations.”
Create a Localization
- Navigate to a piece of content.
- Click on the content to open the Composer.
- Click on the Actions tab. Select “Localize Content.”
- Click “Add” then fill in the required and optional fields.
- Localization Name - A name that specifies this localization.
- Account - The account to use for future localizations.
- Scheduled at - Time the content will be available publicly.
- Workflow - Set up a workflow for future localizations.
- People to Notify - Colleagues who will be notified when a new localization has been created.
- Labels - Specify labels to be used for future localizations.
- Click “Create.”
Once finished, a new localized copy of the original will be created and ready for customization.
The localized content can be accessed from within the original moment and everywhere else you can view content in Opal. To customize, click the localized piece of content to open the Composer.
Create a Localization Template
For some teams, every piece of content requires a localized version for specific regions. In this case, a localization template can be used to create many localizations at one time.
- Navigate to a piece of content.
- Click on the content to open the Composer.
- Click on the Actions tab. Select “Localize Content.”
- Click “Add” then fill in the required fields, approvers, and labels.
- Click “Create.”
- Click “Save as Template.”
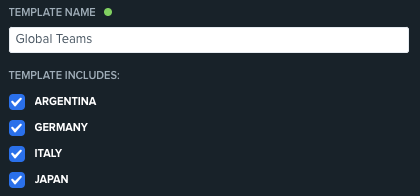
- Type in a name for the template.
- Select the localizations to include in the template.
- Click “Save Template.”
Once finished, a template will be stored for reuse at a later time.

Use a Localization Template
- Navigate to a piece of content.
- Next, click on the content to open the Composer.
- Click on the “Actions” tab, then select “Localize Content.”
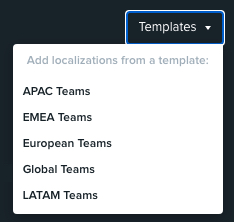
- Click “Templates” and then select your template.
Once selected, the template will create all previously configured localizations. Using localization templates saves time and prevents confusion when repurposing content for multiple markets.
Edit Localization Templates
After localizations and templates have been created, there may be a change in workflow, roles, or regions that require a modification of preconfigured settings. If a change needs to be made, simply edit the localization or template to accommodate your needs.
You can choose to remove localizations from a template or change the settings for an existing localization.
Remove Localizations from a Template
- Navigate to a piece of content that was used to create a localization.
- Next, click on the content to open the Composer.
- Click on the Localization tab.
- Click “Templates”.
- Hover your mouse over the template you’d like to edit, click the gear icon and uncheck the localizations that should be removed from the template.
- Click “Save Template”.
Edit Localization
- Navigate to a piece of content that was used to create a localization.
- Next, click on the content to open the Composer.
- Click on the Localization tab.
- Click “Templates”.
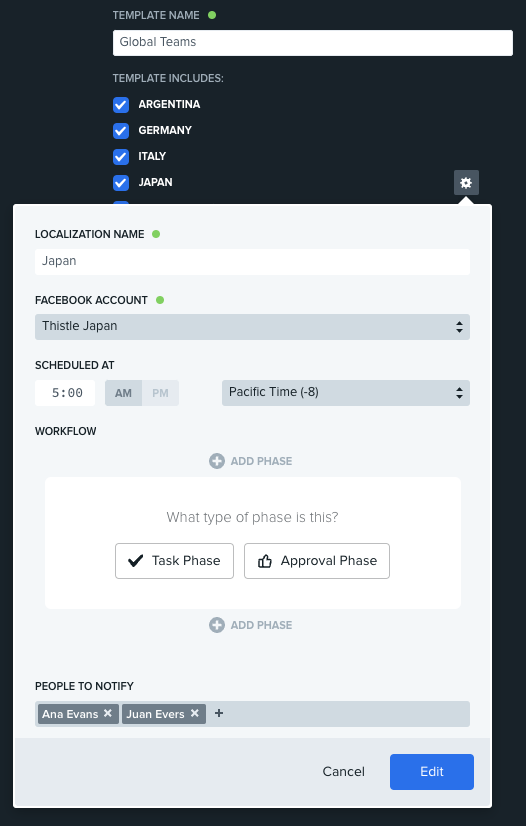
- Hover your mouse over the template you’d like to edit, click the gear icon.
- Hover over the localization you’d like to edit, click the gear icon and make any changes to the existing localization.
- Click "Edit" to save changes.
- Click “Save Template”.
Additional Information
Will localizations retain Delivery Type from the source content?
Yes. Localizations will keep the same delivery type when creating a new individual localization or via a template.
Will localizations retain labels from the source content?
Yes and no. The same labels will be applied if no labels are selected when creating a new localization, or are specified in a template. If labels are added to a new localization, or are saved in a template, the source labels will not be retained.
Will localizations retain workflow settings from the source content?
No. Localization workflow will be defined for each localization by the individual localization, template, account, or workspace.